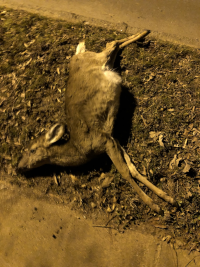
 | February 10, 2022 | I was called out of bed by my dad, who heard the screech of brakes followed by a thump. The car was long gone by the time I got outside, and the deer was about a minute deceased from what looked to be traumatic internal injuries in the torso. So, I found two pairs of gloves, took it by the front hooves, my brother took the back hooves, and we carried it all the way from the street to the backyard. My 3'x3'x10" decomposition box was just big enough. I forwent a trash bag, since all the bones would be too big to fall through the 1/4" hardware mesh floor. |
 | February 11 | Bloating was already setting in by morning. |
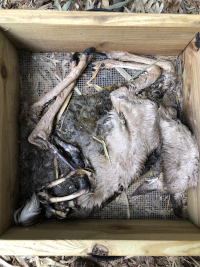
 | February 18 | The stomach started distending and the skin mottled green and blue. The first flies arrived to lay eggs. |
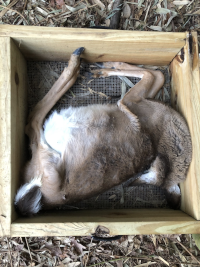
 | March 12 | I was away so I had my brother text me this picture. He decided not to open the lid like I do. I can just make out the pool of larvae where the abdomen skin finally burst. |
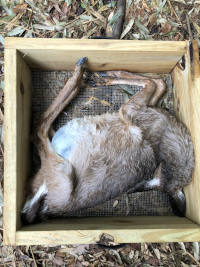
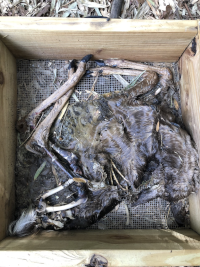
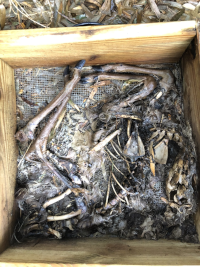
 | March 23 | I returned and immediately propped open the lid for a peek. The larvae were mostly gone and had clearly eaten much of the flesh. I could see how the hide sagged around the cervical vertebrae in the neck and fell away completely at the pelvis and thighs. |
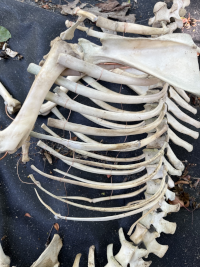
 | March 26 | The skin was starting to harden. I used a stick and tore some back to expose part of the ribcage. I concluded that the impact broke its ribs and punctured at least a few internal organs as cause of death. |
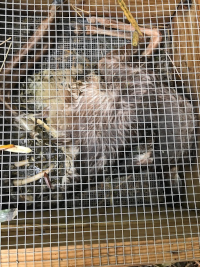
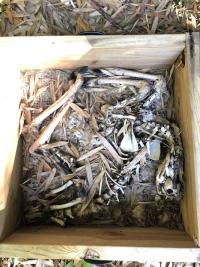
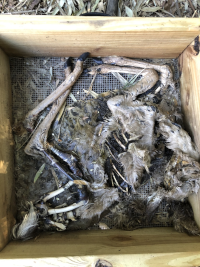 | March 28 | I used another stick and poked and prodded the skin of the head away from the skull, enough to expose the underside of the mandible. The ear came off as a lump of furry cartilage. |
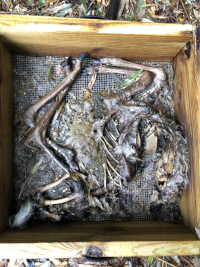 | March 31 | More of the same, with a bit of progress that may or may not have been manually encouraged. |
 | April 7 | At this point, I realized that the lower legs might prove a bit of an issue. Since they were almost entirely bone and tendon, they were decomposing a lot slower than the rest of the body. |
 | May 16 | Leaf litter is a pain and I don't know how so much of it routinely finagles through a 1/2" hardware mesh roof. |
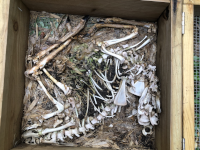 | August 16 | Instead of the strange yellow moldy fungus, there was a strange green moldy fungus, except this one stained the bones green. |
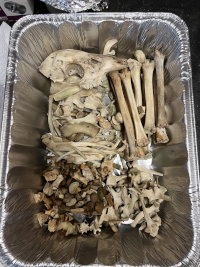
 | September 22 | It was time to harvest. I went to the dollar store and got a turkey basting aluminum tin. I harvested everything but a stubborn hoof that wasn't decomposed all the way yet. |
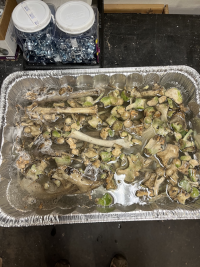 | September 29 | The hydrogen peroxide bath needed three bottles. I scrubbed the bones with the toothbrush, figured they needed another round, and used another two bottles of hydrogen peroxide. |
 | November 17 | I left it in direct sunlight for a month in the hopes the UV radiation would get rid of the green stains. It got around 90% or so, so I was happy. I noted skull damage, so maybe the deer hit the corner of the curb when it went down. At some point I lost patience with the one hoof and put it through the cleaning process. |
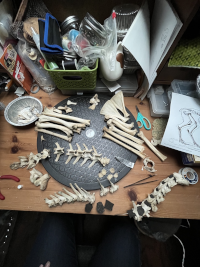 | April 14 | I was so excited for this bit! With a skeleton so big, I broke out the drill and wire. I was making this baby POSABLE. I tried soft lead-free solder wire for the vertebrae, but found that, duh, soft wire does not hold weight well at all. So I found some old house electrical wire, stripped the sheaths, and had several feet of good stiff copper wire. I also found some black foam padding and cut little circles to put between the vertebrae. If I used my normal Gorilla brand I'd go through a dozen tubes, so I pulled out the hot glue gun. |
 | April 15 | A closeup of how I rigged the forelegs. Since the joint is a sliding hinge, I drilled a hole in the back of the bones. The bones were mostly hollow, so I dripped some glue into the hole first and then shoved in the wire until it couldn't go any further. Then I did a dry test insert in the next bone, found how far that went down the bone, then cut off the extra and glued in the wire. The kneecaps there I had to peel off later because I referenced the deer skeleton printout and those "kneecaps" were actually part of the hind leg. And deer don't have kneecaps. I detached the kneecaps and reglued them to the correct legs. |
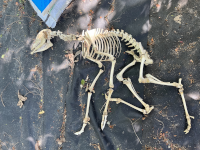
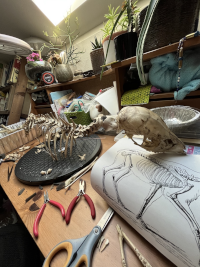 | April 18 | I got the vertebrae, head, and ribs on. |
 | April 21 | This is when I had it all assembled. The ribs kept getting in the way so I took some 24g jewelry wire and wove that in to hopefully keep them in place better. |
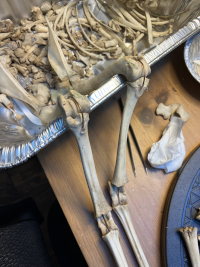
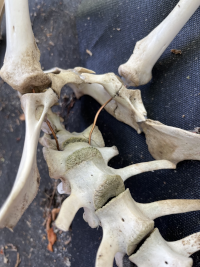 | April 21 | The pelvis and how I rigged it. |
 | April 21 | The deer, after I sprayed it with polyurethane. |
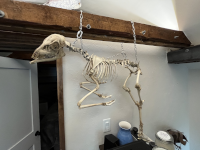 | April 21 | The deer, in its place of honor. I later replaced the chains with something less heavy-looking. Every so often I put it in a different pose. Its full name is Darling Deer. |